


Please allow Pop-ups from scalemodelbuildings.co in order to fully utilize our website
Cardstock Construction continued:
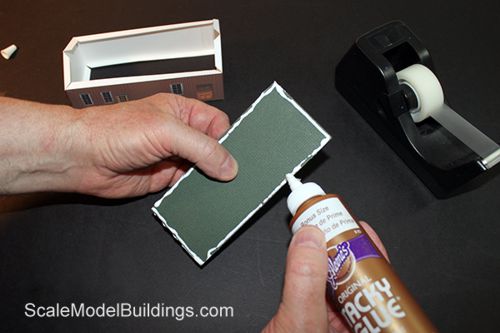
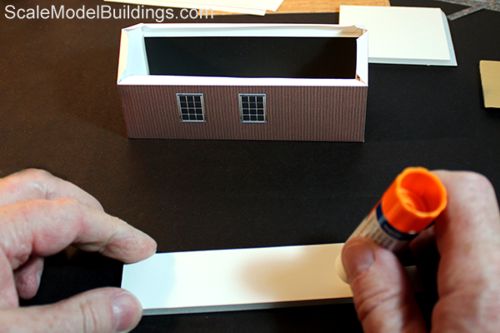
Step 21:
Run a seam of glue along the perimeter of the floor.
Place the floor inside the structure with the glued surface facing downward to mate with the inside surface of the bottom fold tabs.
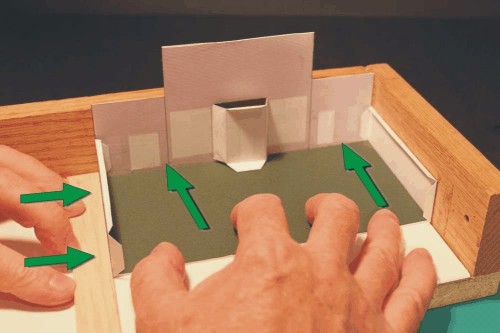
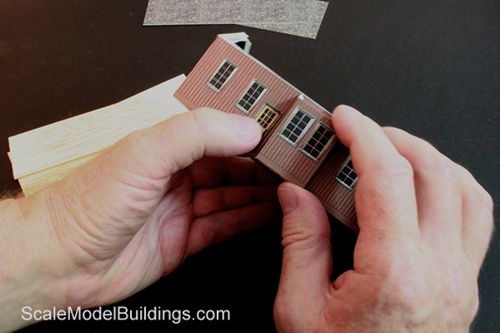
Step 22:
For some models it might be easier to slide the floor into place prior to adding the final wall.
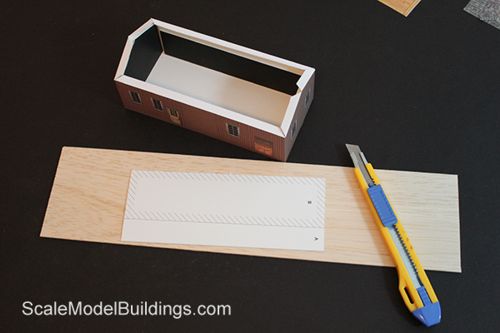
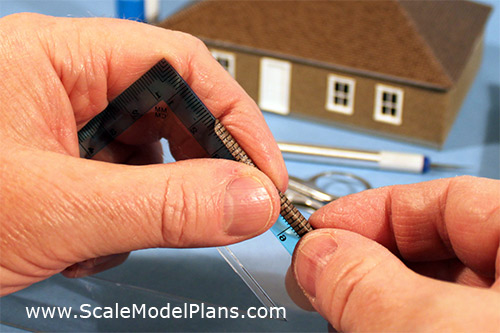
Step 23:
Use a small square to check the corners, then press the floor into place to set the glue. A sheet of wax paper will protect the surface of your wok area.
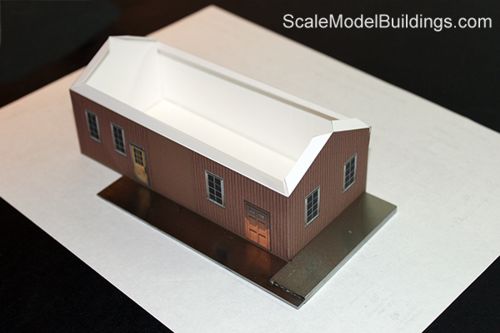
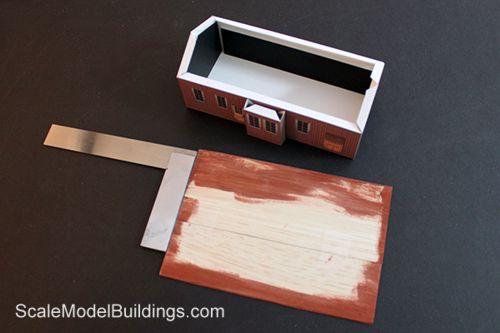
Step 24:
Scotch tape or transparent tape can be applied to the underside of the floor to hold the walls in position while the glue sets. The tape will also help to contain any glue that seeps from the seams.
Step 25:
Scraps of foam core can be used on the inside of the structure to reinforce the walls. These can be random pieces, and do not have to fit precisely.
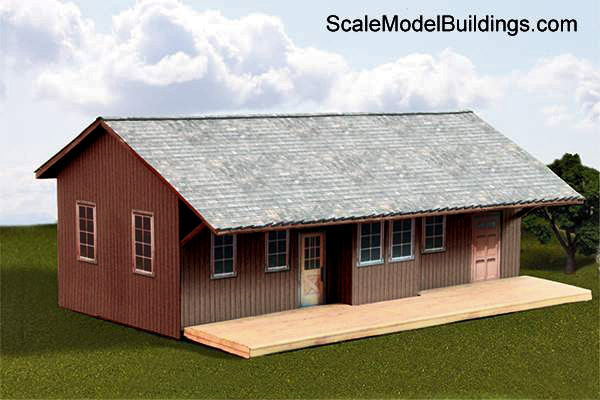
Step 26: Reinforcements on the inside of walls will make it easier to add on any details such as this ticket bay from Plan 735c. |
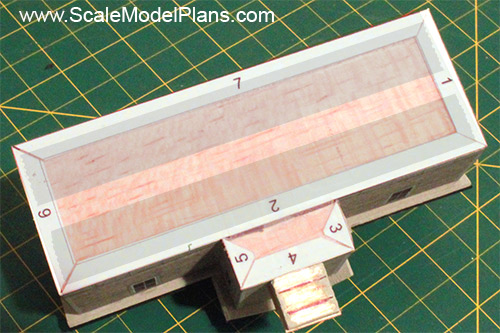
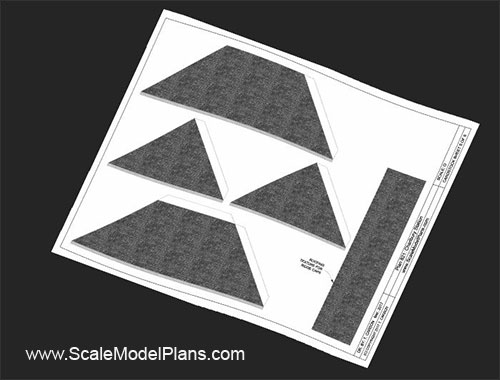
Step 27:
The roof for this model is not symmetrical, so the template will be cut in two stages – the larger panel first, the second, shaded section.
Again, you can use balsa or photo mat board for the roof sub-surface.

Visit our News Page for monthly discounts on select plan packages.
Up to 15% off!
Step 28:
Here, the two roof panels are painted along the exposed edges. Photo mat board can be painted, or colored with marker pens, if required.
Line up the two panels along the roof ridge and tape together with transparent tape. Allow a small gap between the ridge edges. The gap will close up as you fold the two roof panels to the correct angle.
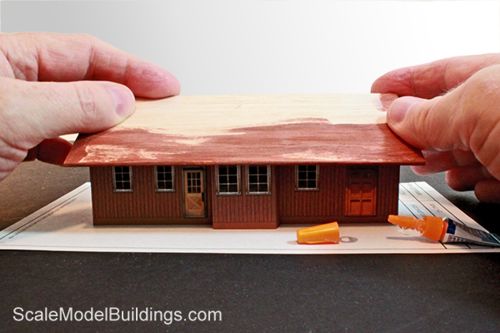
Step 29:
Test fit the roof onto the structure.
You can apply a few drops of cyanoacrylate (crazy glue) along the middle of the roof ridge line, being careful not to glue the roof to the structure at this time.
Once you have the right angle established, remove the roof and apply more glue along the ridge.
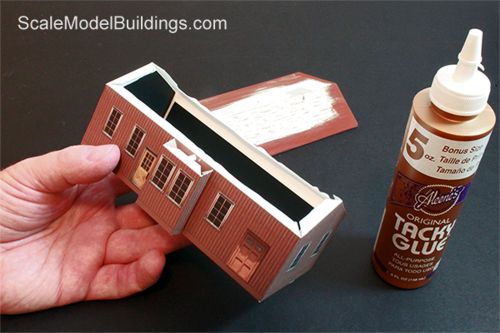
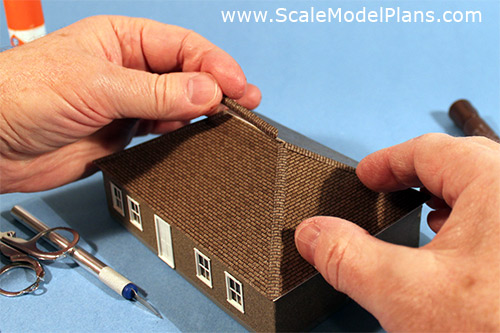
Step 30:
If you want to permanently attach the roof, run a seam of craft glue along the perimeter of folding tabs, and carefully attach the roof. Make sure that the roof is centered on the structure.
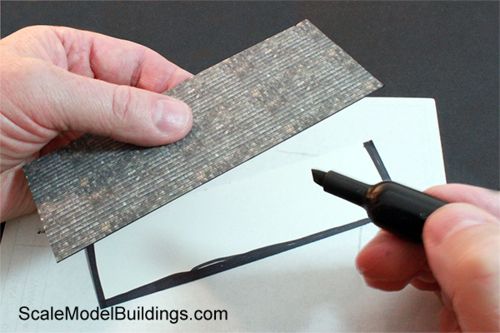
Step 31:
Use a black marker along all exposed edges of each roofing sheet to hide the white edges.
A thin film of craft glue, or glue stick can be used to bond the roofing material to the roof sub-surface.
Use extreme care when lining up and applying the roofing material, as it may be damaged if you have to remove and re-position it.
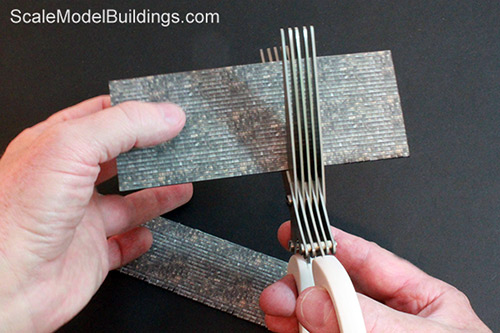
Step 32:
Optional:
These scissors are from the Martha Stewart section of the craft store. The same effect can be done with a hobby knife, but this makes it easier to serrate the lower edge of the roofing panels.
Step 33:
The serrated lower edges of the roofing material give a more realistic shake roof appearance.
Some plan packages include extra roofing material. Use this to create a “ridge cap” to cover the seams where the two roof panels meet.
Step 34:
Optional:
Strips of roofing material can be cut to form roof caps. Cut the strips to the approximate width of about one or two shingle tabs. Color the exposed white edges with a felt marker. Crease along the length using a thin straight edge.
Step 35:
The roof caps provide a more realistic look, and can also hide gaps in the roof panels..
Step 36:
Some models may require a “cottage” roof. A cottage roof is sloped on all sides. There are no gable end walls. They can be a little trickier to attach to a structure, but this method should make the procedure a little simpler.
Score and trim where necessary as described previously. Remember to leave tabs on one of the ridge surfaces as well as any roof surface that needs to be mated to another surface.
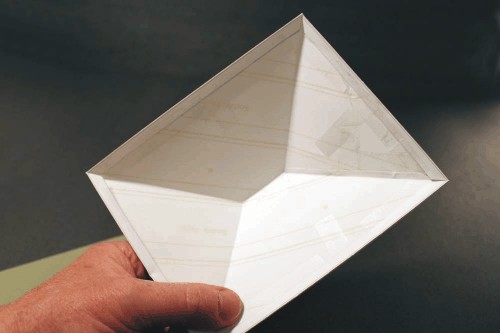
Step 37:
Carefully assemble the roof, aligning the edges as closely as possible.
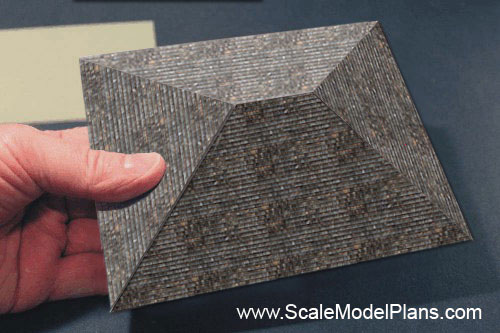
Step 38:
Make sure that the fascia’s, (the vertical trim edge of the roof) are aligned vertically, then tape the soffit where it meets the underside of the roof.
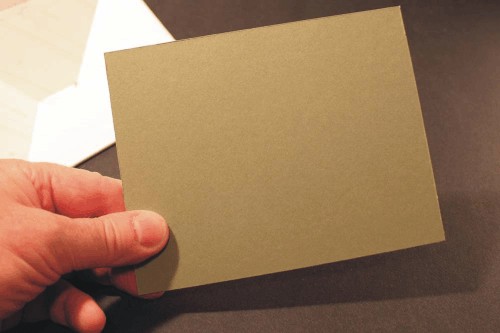
Step 39:
Use the floor plan as a template and cut the shape out of balsa, mat board, or other suitable material. It’s important that the material is perfectly flat and relatively rigid.
This piece will become a single-piece soffit.
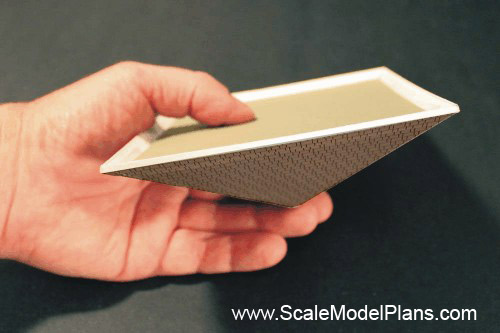
Step 40:
The soffit should fit slightly recessed into the roof assembly. Glue or tape the soffit to the underside of the roof.

This is Plan 821 - Charlbury Station showing a typical cottage roof.
Attach the roof assembly by applying glue to the tabs along the tops of each wall. Assuming that the soffit was seated evenly into the underside of the roof, the roof should now sit evenly onto the structure. If for some reason the roof doesn’t sit evenly, you can shim it with strips of paper or cardstock.
That's it - one more structure for your layout!
 |
Check out our Video tutorial |
View our On-line Catalog
of N Scale and HO Scale plans, templates, and Cardstock patterns, then click to order the printable PDF files so you can get started on your next project.
Disclaimer:
Information provided in these tutorials is for
informational purposes only. Owners of this website offer no
guarantees and assume no responsibility or liability of any type
with respect to the content of these tutorials and will not be
held liable for any damages or injuries caused by using or
misusing the information on this site, and anyone using these
methods does so at his/her own risk. By viewing these articles
you agree that you will not hold, or seek to hold, Owners of
this site responsible or liable with respect to the content of
this site. Processes illustrated on this website should not be
undertaken without a complete understanding and knowledge of the
safe and proper use of all related tools and processes.
Contact Us © 2022 T. Carson Legal