


Please allow Pop-ups from ScaleModelPlans.com in order to fully utilize our website
Setting up ScaleModelPlans Templates For Model Builder ® software
Build Any of our plans easily and inexpensively - an alternative to wood or styrene construction. Please read on...
 Model Builder Templates are no longer sent with the main download files. If you are a licensed owner of the Evan Designs Model Builder program, once you have downloaded your purchase please select the Link on the file download page to receive your Model Builder Templates.
The Setup Guide lists the settings required when using ModelBuilder ® software - click here for settings
Plan templates are supplied in either N scale, HO scale, OO scale, or O scale, but may be adaptable to other scales as well. Z Scale construction can be achieved using N Scale templates. More information on adapting existing plans to other scales will be coming soon.
Using N Scale Templates for Z Scale construction
(Use settings in MB Setup Guide for Z Scale.)
Model Builder templates are available for most ScaleModelPlans.com plan packages. Follow the link on the file download page after placing your order with us. Your MB template files will be sent by email.
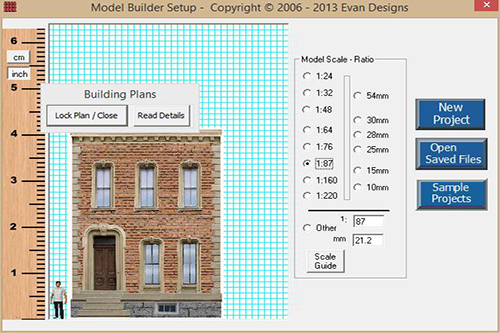
Fig. 1
Setting up Your Project:
- Set the appropriate scale in the opening window of Model Builder, click on the New Project button to start a new project.
- If using N Scale templates for Z Scale construction choose 1:220 at this point.
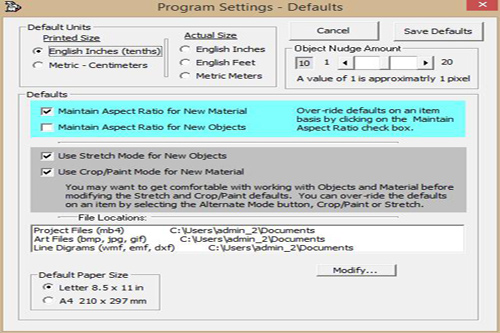
Fig. 2
Displaying the proper ruler:
- From the File menu at the top of the page choose Program Settings...
- Select English Inches (tenths) under the Printed Size menu.
- Choose Letter 8.5 x 11 in under Default Paper Size.
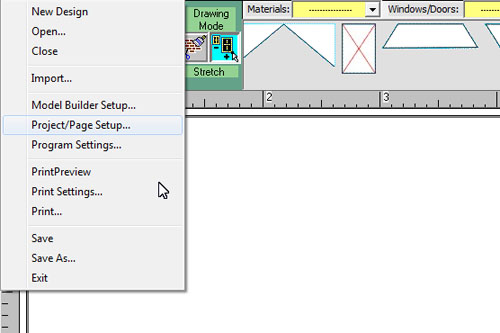
Fig. 3
- Select File
 Project/Page Setup... from the menu bar.

Fig. 4
- Set the paper size and orientation (portrait or landscape)according to your specific ScaleModelPlans.com project from the MB Setup Guide at the bottom of this tutorial.
- Set the Top, Right, Bottom, and Left Page Margins all to "0". These settings are important for your model to print to the proper size.
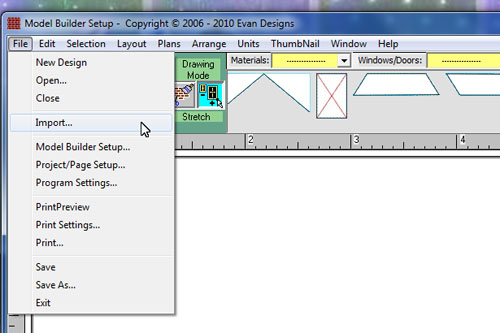
Fig. 5
Importing the Template:
- Select File Import... from
the menu bar and browse to the folder where you stored your ScaleModelPlans templates.
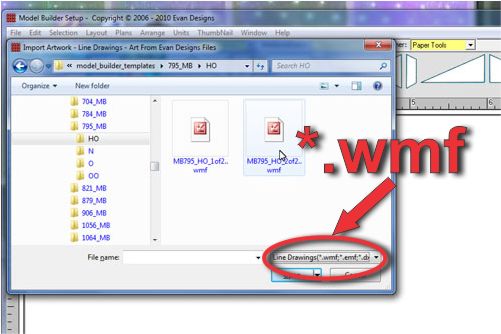
Fig. 6
- Since the templates are in WMF, (windows meta file) format you will need to select the appropriate line in the menu button at the lower right corner of the browsing window, otherwise you won't be able to see the file names.
- This tutorial is using Plan 795 in HO scale. You will see that this particular project in HO scale has two Model Builder template files. For economy of space each file may contain a mixture of wall and roof components, but Model Builder will allow you to change the templates back and forth if you want to rearrange your textured components in a different order.
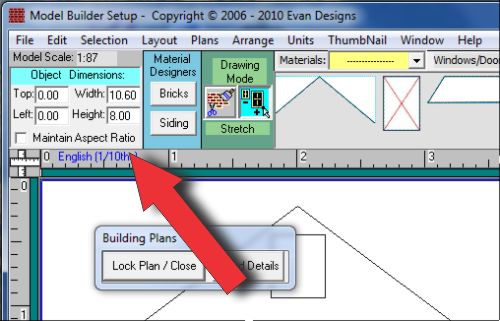
Fig. 7
- After importing a template, select the template in the Model Builder work area so that it is highlighted, and some numbers will appear in the Object Dimensions windows.
- You will see the typical "re-sizing" handles surrounding the template, but do not use these handles to re-size.
- Initially, set the Top and Left settings to "0". Set the Width and Height settings according to the MB Setup Guide for your particular ScaleModelPlans.com project.
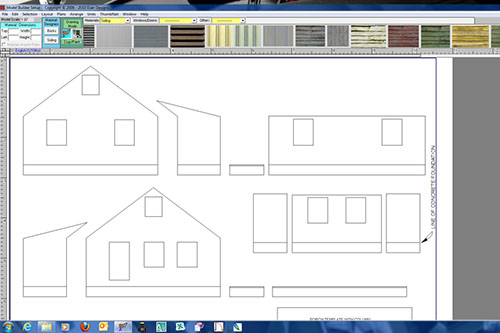
Fig. 8
- Once the template is adjusted to proper size you can drag it with the mouse to center it in the Model Builder work area, (the white space).
- Model Builder refers to the template as a Building Line Diagram. Lock it in place by going to Plans Lock Building Line Diagram.
- Different printer makes and models will have different "gripping edges", (non-printing borders). For most common printers you should be safe if you stay within the extreme boundaries of the template images, but you are free to unlock the template and move it around.
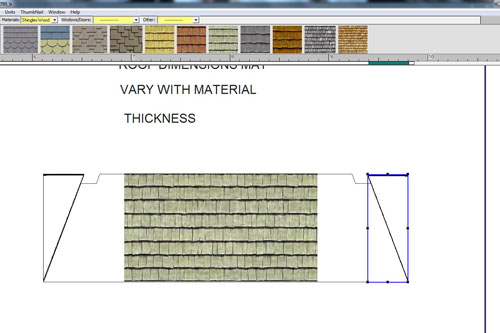
Fig. 9
Using Paper Tools:
- Model Builder uses various shapes of masks to help create the shapes of the building sections. These are found under Other:
Paper Tools in the Design Screen.
- One method of constructing the project is to select the texture and resize it to fit the pattern, then mask off the excess areas with the Paper Tools, but I prefer to work the other way around - drag the required Paper Tools into position, then insert and resize the texture.

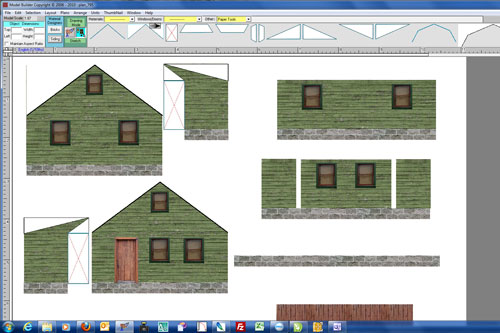
Fig. 10
- This is Plan 795 - Rancher done in horizontal siding and a cinder block foundation.

Fig. 11
Re-arranging the Layout:
- You can use the Ctrl + Click method to select each component of a particular wall to move them as a group around the screen. (Hold down the Control Key while you select each part).
- You can then move walls around to their respective positions. This will cut down on the number of joins in you model.
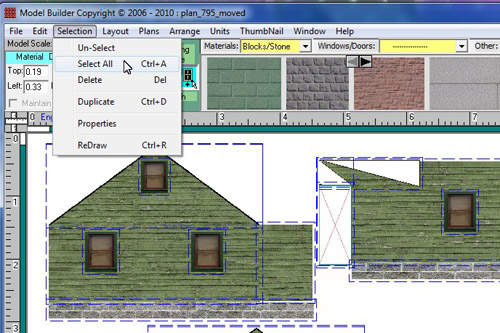
Fig. 12
- Once you have finished re-arranging, have a final look at the overall layout in relation to the edges of the workspace. For most printers you should leave a margin of about 1/2 in. along each edge.
- To move the entire model got to Selection Select All.
- Click and drag on any of the selected areas to re-locate the images.
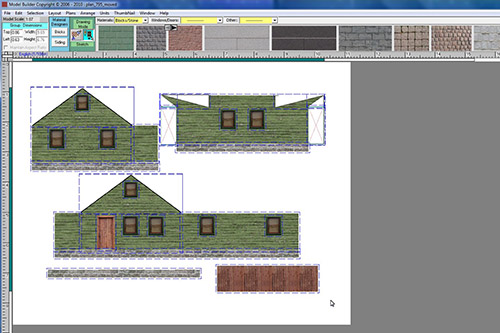
Fig. 13
- Refer to the procedures in the Cardstock Construction Guide to set up your printer.
- An alternative to printing to cardstock is to print to a matte photo paper, or inkjet paper and glue the pieces to either foam board or mat-board. This will produce a sturdier finished product.
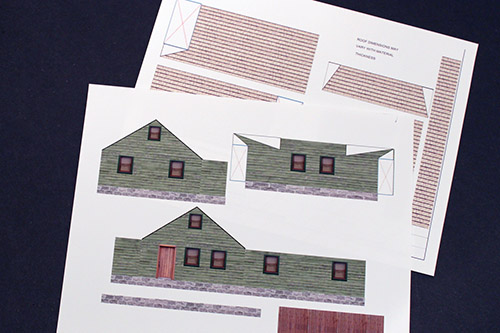
Fig. 14
- Use the procedures in the CardstockConstruction Guide to prepare and assemble your model.
- Notice the extra roofing material on the bottom sheet. This is to make ridge caps for a more realistic appearance.

Fig. 15
- This model uses mat board as a base for the walls and the roof. Follow the procedure outlined in the Cardstock Construction Guide included with your plans.
Click the link below and follow the settings for your plan number.
Disclaimer:
Information provided in these tutorials is for informational purposes only. Owners of this website offer no guarantees and assume no responsibility or liability of any type with respect to the content of these tutorials and will not be held liable for any damages or injuries caused by using or misusing the information on this site, and anyone using these methods does so at his/her own risk. By viewing these articles you agree that you will not hold, or seek to hold, Owners of this site responsible or liable with respect to the content of this site. Processes illustrated on this website should not be undertaken without a complete understanding and knowledge of the safe and proper use of all related tools and processes.
Contact Us © 2022 T. Carson Legal